The Janome sewing machine needle threader is a convenient tool designed to make threading the needle faster and easier, particularly for those who may struggle with threading by hand due to poor eyesight or dexterity issues. While it may seem simple, using the needle threader correctly requires a few precise steps to ensure smooth operation and avoid damaging the needle or thread. Understanding the Janome needle threader instructions thoroughly can help users get consistent results and save time during sewing projects. Following the proper procedure also enhances the life of both the threader and the sewing machine, making sewing a more enjoyable experience for beginners and experienced users alike.
Understanding the Needle Threader on a Janome Machine
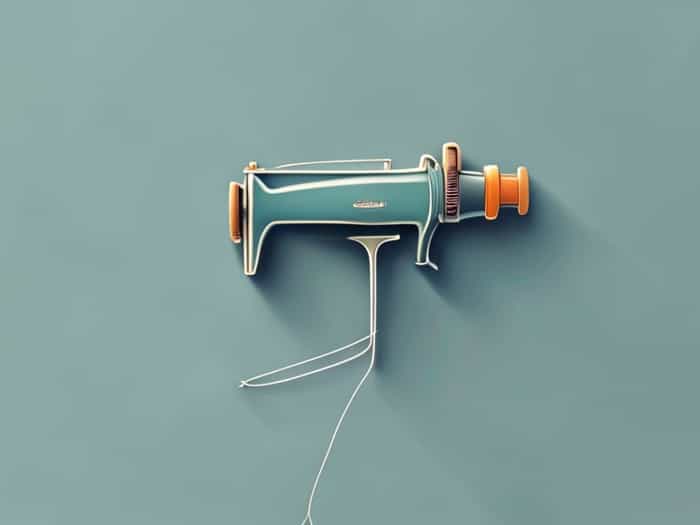
The needle threader on a Janome sewing machine consists of a small lever or hook mechanism located near the needle. Its purpose is to guide the thread through the eye of the needle with minimal effort. Janome needle threaders are designed for precision and ease of use, but familiarity with its components and operation is essential for optimal performance. The threader generally includes a small hook that passes through the needle eye, catches the thread, and pulls it through, eliminating the need for manual threading.
Benefits of Using a Needle Threader
- Reduces eye strain and frustration when threading the needle.
- Saves time during sewing projects, especially when changing threads frequently.
- Ensures consistent and accurate threading, reducing the risk of skipped stitches.
- Assists beginners and those with limited dexterity in handling sewing tasks more efficiently.
Preparing Your Janome Sewing Machine
Before using the needle threader, it is important to ensure that your sewing machine is properly prepared. This preparation prevents damage to the needle, thread, or threader and makes the process smoother.
Steps to Prepare the Machine
- Turn off the sewing machine and unplug it to ensure safety during setup.
- Raise the needle to its highest position using the handwheel or needle position control.
- Lift the presser foot to release tension on the thread and allow smooth threading.
- Ensure the correct needle is installed and properly secured; the needle threader works best with standard Janome needles.
- Select a thread suitable for the fabric and needle size; avoid overly thick or slippery threads that may jam the threader.
Step-by-Step Janome Needle Threader Instructions
Following the proper sequence is crucial for successful threading using the Janome needle threader. Below are detailed instructions to guide you through the process.
Step 1 Position the Needle Threader
Locate the needle threader lever near the needle on your Janome machine. Depending on your model, this may involve pulling down a small lever or aligning a hook with the needle eye. Ensure that the hook passes directly through the needle eye to catch the thread efficiently.
Step 2 Place the Thread Correctly
Hold the thread lightly and position it along the threader hook. Some models require you to guide the thread across a small groove or under a hook. Ensure the thread is not twisted and that it lays flat to avoid snagging. A properly positioned thread improves the success rate and reduces repeated attempts.
Step 3 Activate the Threader
Engage the needle threader by pressing or lowering the lever, depending on your Janome model. The hook will pass through the needle eye and catch the thread. In some models, you may notice a small loop of thread forming behind the needle. This loop is essential for completing the threading process.
Step 4 Pull the Thread Through
Gently pull the loop created by the threader to bring the thread completely through the needle eye. Avoid pulling forcefully, as this could bend the needle or break the thread. Once the thread is through, you can adjust the thread length as needed for your sewing project.
Step 5 Secure and Test
After threading, release the needle threader and lower the presser foot. Test the stitching on a scrap piece of fabric to ensure the thread is properly seated and the tension is correct. This verification step ensures smooth sewing and prevents skipped stitches or thread breakage during your main project.
Tips for Successful Threading
Even with a needle threader, certain practices can improve success and prevent frustration. Consider the following tips when using your Janome needle threader
- Use quality thread appropriate for your fabric to reduce tangling or snapping.
- Keep the needle clean and free of lint or fabric debris for smooth threading.
- Ensure adequate lighting and a comfortable posture to reduce strain during threading.
- If the threader does not catch the thread, slightly reposition the thread and repeat the process rather than forcing it.
- Regularly check and maintain the needle threader mechanism to avoid wear or misalignment.
Common Issues and Troubleshooting
Even experienced sewers may encounter issues when using a Janome needle threader. Understanding common problems and solutions can prevent frustration and maintain the efficiency of your sewing machine.
Threader Fails to Catch Thread
Ensure that the thread is placed properly on the hook and is lying flat. Check that the needle is fully inserted and not bent. Sometimes, gently cleaning the threader or repositioning the thread resolves the issue.
Thread Breaks During Threading
This can occur if the thread is too thick, old, or of poor quality. Using a thinner, smooth thread often solves the problem. Also, avoid pulling the loop too forcefully, as excessive tension can break the thread.
Needle Bends or Breaks
Bent or improperly installed needles can cause the threader to malfunction. Always use the correct needle for your Janome model, ensure it is fully seated, and avoid using excessive force on the threader.
Maintenance and Care
Proper maintenance extends the life of your Janome needle threader and ensures consistent performance. Regularly clean the area around the needle and threader, removing lint or dust. Inspect the hook mechanism for any signs of wear, and replace any damaged needles immediately. Store your sewing machine in a clean, dry environment to prevent corrosion or misalignment of delicate parts.
Preventative Maintenance Tips
- Clean the needle area and threader weekly to remove lint.
- Check needle alignment regularly to ensure smooth threading.
- Lubricate moving parts of the machine according to the Janome manual.
- Replace worn or bent needles promptly to prevent damage to the threader.
Mastering the Janome needle threader instructions can greatly enhance the sewing experience, making needle threading quick, precise, and less stressful. By understanding the components, following step-by-step procedures, and incorporating proper maintenance, users can achieve consistent results and reduce the likelihood of threading issues. Whether you are a beginner or an experienced sewer, utilizing the needle threader effectively saves time, reduces eye strain, and allows for smoother operation during sewing projects. Following these instructions ensures that your Janome machine continues to provide reliable performance while making every sewing session more efficient and enjoyable.