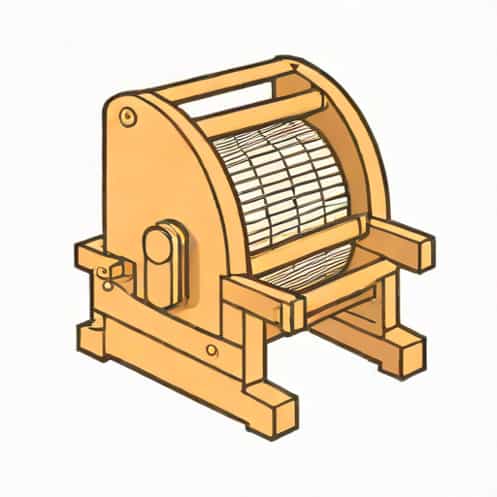
Creating your own drum carder can be a rewarding project for those interested in fiber arts, particularly spinning and wool preparation. A drum carder is a mechanical device used to prepare raw fibers for spinning by carding them, which helps to blend fibers and align them into a smooth, even batt. For crafters who want more control over the texture and blend of their fibers, building a drum carder at home can be a fun and cost-effective option. This guide will walk you through the process of making a simple drum carder, step by step, using basic materials and tools. Whether you’re a seasoned fiber artist or a beginner looking to experiment, making your own drum carder allows you to customize it to your specific needs and preferences.
Understanding How a Drum Carder Works
Before diving into the process of building a drum carder, it’s important to understand how it works. A drum carder consists of two rotating cylinders one large drum and one smaller drum that are covered with wire teeth. These drums rotate in opposite directions, pulling the raw fibers through, and carding or brushing them into a smooth, even batt. The fibers are then transferred onto the large drum, where they are aligned and compressed into a flat, uniform sheet, ready for spinning into yarn.
Basic Components of a Drum Carder
The essential components of a drum carder include
- DrumsThe larger drum is the main working drum, and the smaller one is used to assist in pulling fibers through the carding process.
- Teeth or WireThe drums are covered with carding wire, which has small, needle-like teeth that help to separate and blend fibers.
- Drive MechanismThis is typically a hand-crank or motor that rotates the drums.
- FrameThe frame holds everything together and provides stability during the carding process.
- Collection TrayThis is where the carded fibers (the batt) are collected after the carding process is complete.
Materials You Will Need
Building a drum carder requires some basic materials and tools. Here is a list of what you’ll need to get started
- Wooden boardsFor the frame and drum housing. Plywood or hardwood is ideal.
- Carding wireThis is the wire that will be attached to the drums. It can be purchased online or from a craft store.
- Metal rods or dowelsThese will be used for the axles that allow the drums to rotate.
- Drum hardwareBearings or bushings to help the drums rotate smoothly.
- Hand crank or motorTo turn the drums. A hand crank is simpler to use, but a small electric motor can be added for automatic operation.
- ToolsSaw, drill, screwdriver, staple gun, hammer, and measuring tape.
- FastenersScrews, nails, or glue to hold the components together.
Step-by-Step Guide to Making a Drum Carder
Step 1 Building the Frame
The frame of the drum carder will hold all the other components in place. Start by cutting two large rectangular pieces of wood for the sides of the frame. The size of the frame will depend on the size of the drum carder you want to make. A typical frame is about 18 inches wide by 24 inches tall.
Next, cut four smaller pieces of wood for the top, bottom, and back of the frame. Use screws or nails to assemble the frame, ensuring that the edges are square and secure. The frame should be sturdy enough to support the rotating drums and the tension of the carding process.
Step 2 Preparing the Drums
To create the drums, you will need to cut two wooden cylinders. You can use a dowel or metal rod as the base, cutting it to the desired length for your drum. Typically, the larger drum is around 12 inches in diameter, and the smaller drum is around 6 inches in diameter.
Once the cylinders are cut, the next step is to attach the carding wire. Cut the carding wire to fit the circumference of the drums, and then staple it tightly onto the wooden drum. Make sure the wire teeth are pointing outward, as this is what will card the fibers. You can either purchase pre-made carding wire or make your own by cutting and shaping wire into fine, sharp teeth.
Step 3 Attaching the Drums to the Frame
After the drums are prepared, attach them to the frame. The larger drum should be placed at the bottom of the frame, and the smaller drum should be positioned just above it. Both drums need to be able to rotate freely, so install bearings or bushings at either end of each drum to allow smooth rotation.
Next, connect the axles to the drums. The axles will go through the bearings and will allow the drums to spin. Be sure the axles are fixed securely and are aligned properly to ensure smooth movement of the drums.
Step 4 Adding the Drive Mechanism
To make the drum carder functional, you’ll need to install a drive mechanism. A simple hand crank can be attached to one of the axles, allowing you to manually turn the drums. Alternatively, a small electric motor can be added to automate the process. If you opt for a motor, make sure it’s low-speed and can be adjusted to match the speed of the carding process.
Ensure the crank or motor is securely attached to the frame and is connected to the axle with a gear or belt system. This will allow you to rotate the drums simultaneously, pulling fibers through and carding them effectively.
Step 5 Final Assembly and Adjustments
Once the drums and drive mechanism are in place, you can adjust the tension of the drums. The carding wire should be taut but not overly tight. Adjust the distance between the drums so they can rotate freely without any rubbing. Check for any wobbling or misalignment of the drums and make adjustments as needed.
Finally, add a collection tray underneath the larger drum to catch the carded fiber batt. This tray can be a simple wooden box or a flat surface where the carded fibers can collect as they are pulled from the drum.
Testing and Using Your Drum Carder
Once your drum carder is assembled, it’s time to test it. Begin by feeding small amounts of raw fiber into the carding drums and turn the crank or motor slowly. Observe how the fibers are processed and make sure the carding wire is doing its job. If you find any problems, such as uneven carding or misalignment, stop and make the necessary adjustments.
When you’re satisfied with the carding process, you can start using your drum carder regularly to prepare fibers for spinning. Experiment with different fiber blends and textures to see what works best for your needs.
Building a drum carder is a fun and rewarding project that allows you to create a custom tool tailored to your fiber preparation needs. By following these steps, you can make a simple yet effective drum carder that will help you prepare fibers for spinning or other fiber art projects. With some patience and the right materials, you can create a high-quality drum carder that will serve you for years to come. Whether you’re a seasoned spinner or a beginner, this DIY project can enhance your crafting experience and give you a deeper understanding of the tools you use.