Gluten free flapjacks are the perfect snack for those who want a wholesome, chewy, and naturally sweet treat without the presence of wheat or gluten. Whether you’re celiac, gluten intolerant, or simply looking to cut back on gluten, this recipe offers a satisfying and delicious alternative to traditional flapjacks. Made with certified gluten free oats, rich golden syrup, and plant-based butter, these flapjacks are easy to prepare and can be customized with various ingredients like dried fruits, seeds, or even chocolate chips. They’re ideal for lunchboxes, afternoon tea, or a quick breakfast on-the-go.
What Are Gluten Free Flapjacks?
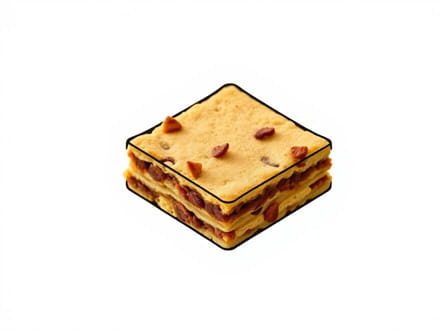
Flapjacks in the UK refer to chewy oat bars, not pancakes. A classic flapjack is made from oats, butter, golden syrup, and sugar, all baked to perfection. This gluten free version sticks to the traditional style while replacing any gluten-containing ingredients with safe alternatives. The result is a chewy, golden treat that’s both satisfying and naturally gluten free if prepared carefully with certified ingredients.
Ingredients for Gluten Free Flapjack
Making gluten free flapjacks doesn’t require a long shopping list. In fact, most of the ingredients may already be in your kitchen. Here’s what you’ll need:
- 250g gluten free rolled oats
- 125g unsalted butter or dairy-free spread
- 100g light brown sugar
- 100g golden syrup (or use maple syrup or honey as an alternative)
- 1/2 teaspoon salt
- Optional: 1/2 teaspoon ground cinnamon
- Optional add-ins: 50g raisins, dried cranberries, sunflower seeds, pumpkin seeds, or dark chocolate chips
Note: Make sure all ingredients, especially oats and syrup, are labeled gluten free. Cross-contamination is a common issue, so certified products are key for a safe recipe.
Step-by-Step Instructions
Step 1: Preheat the Oven
Preheat your oven to 180°C (160°C fan) or 350°F. Line an 8-inch square baking tin with parchment paper, leaving a bit hanging over the edges for easy removal later.
Step 2: Melt the Butter Mixture
In a medium saucepan over low heat, melt the butter, brown sugar, and golden syrup together. Stir occasionally until everything is fully melted and combined into a smooth, golden mixture. Remove from the heat.
Step 3: Mix the Dry Ingredients
In a large bowl, stir together the gluten free oats, salt, and cinnamon if using. Pour the melted mixture over the oats and stir well until everything is fully coated. If you’re adding extras like raisins or seeds, stir them in now.
Step 4: Press into the Tin
Spoon the mixture into the prepared baking tin and press it down evenly using the back of a spoon or a spatula. Firmly pressing the mixture helps the flapjacks hold their shape after baking.
Step 5: Bake
Place the tin in the preheated oven and bake for 20 to 25 minutes, or until the edges are golden brown and slightly crisp. The center should still feel soft don’t overbake, or they may become too hard once cooled.
Step 6: Cool and Slice
Allow the flapjacks to cool in the tin for at least 15 minutes before removing. Use the parchment paper to lift them out, then cut into squares or bars. For the cleanest cuts, let them cool completely before slicing.
Customizing Your Gluten Free Flapjack
One of the best things about flapjacks is their flexibility. You can adapt the base recipe to suit your taste or nutritional needs. Here are a few ideas:
- Fruit and nut: Add chopped dried apricots, dates, or figs along with chopped almonds or walnuts.
- Vegan chocolate chip: Fold in a handful of dairy-free chocolate chips once the mixture has slightly cooled before baking.
- Seed power: Add flaxseeds, chia seeds, or sunflower seeds for added crunch and nutrition.
- Tropical version: Mix in dried pineapple and shredded coconut for a tropical twist.
Tips for Perfect Gluten Free Flapjacks
- Use certified gluten free oats: Regular oats may be contaminated with gluten during processing, so choose certified oats.
- Don’t overbake: Flapjacks firm up as they cool. If they look too soft in the oven, that’s okay they’ll set as they rest.
- Add variety: Experiment with ingredients based on season or what’s available in your pantry.
- Use parchment paper: It prevents sticking and helps you lift the flapjacks out of the tin easily.
Storage and Shelf Life
Flapjacks keep well and are great for meal prep. Here’s how to store them properly:
- Room temperature: Store in an airtight container for up to 5 days. Place parchment between layers to prevent sticking.
- Refrigerator: You can keep flapjacks in the fridge for up to 10 days, though they may become firmer.
- Freezer: Wrap individual bars in cling film or parchment and freeze in a sealed container. They’ll last up to 2 months. Thaw at room temperature before eating.
Serving Suggestions
Gluten free flapjacks are incredibly versatile and can be served in many ways:
- As a snack: Enjoy with a cup of tea or coffee for a mid-morning or afternoon pick-me-up.
- Breakfast on-the-go: Pair with fruit and yogurt for a quick, energy-boosting breakfast.
- Dessert: Drizzle with melted chocolate or serve with a scoop of dairy-free ice cream for a simple dessert.
Common Questions
Can I make these flapjacks dairy-free?
Yes. Simply use a dairy-free margarine or vegan butter alternative in place of regular butter. Make sure it’s suitable for baking and not overly watery.
Is golden syrup gluten free?
Yes, pure golden syrup is naturally gluten free. However, always check the label to ensure there’s no risk of cross-contamination during production.
Can I use quick oats instead of rolled oats?
You can, but the texture will be softer and less chewy. Rolled oats are preferred for traditional flapjack texture.
How do I prevent flapjacks from falling apart?
Press the mixture firmly into the tin before baking and allow them to cool completely before slicing. Avoid using too many add-ins that might disrupt the structure.
This gluten free flapjack recipe is proof that simple ingredients can produce a delicious, comforting treat. Perfectly chewy, slightly crisp on the edges, and endlessly customizable, these oat bars are ideal for any time of day. Whether you’re preparing snacks for your family, packing lunchbox treats, or just craving something sweet and satisfying, this recipe is a must-have in your gluten free baking collection. Make a batch today and discover just how tasty gluten free living can be one flapjack at a time.