In the chaotic and unforgiving world ofLet It Die, danger lurks in every corner of the Tower of Barbs. Players face numerous enemies, environmental hazards, and terrifying bosses on their climb to the top. One of the most infamous foes encountered in the tower is Red Napalm, a deadly and powerful Hatred-based enemy that tests even the most experienced players. With intense combat mechanics, overwhelming power, and a design straight from a nightmare, Red Napalm stands as a brutal challenge and a symbol of what makesLet It Diesuch a unique gaming experience.
Who is Red Napalm?
A Creature Born of Hatred
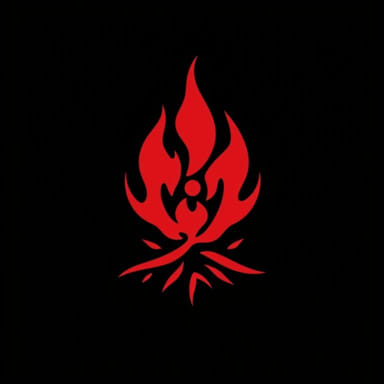
Red Napalm is a rare, high-level enemy classified as a Hatred Beast inLet It Die. These enemies are manifestations of deep emotion, and Red Napalm represents raw, burning hatred. From the moment you first encounter her, it becomes clear that this isn’t just another regular opponent. Her appearance is grotesque and fiery, with a molten, almost demonic presence that dominates the arena.
Location and Conditions
Red Napalm is not found randomly. She appears at the higher floors of the Tower of Barbs under specific conditions, often during limited-time events or through specific unlock criteria. Reaching her arena requires strong fighters, upgraded gear, and careful planning. She is part of the Hatred Boss Series, which also includes other devastating enemies like White Steel and Black Thunder.
Preparing for the Fight
Level and Gear Requirements
Red Napalm is not a boss you can challenge early in the game. You will need to be at a high Fighter Grade with powerful weapons, ideally tier 4 or higher. Armor should also be fully upgraded and provide solid resistance against fire damage. Speed and stamina management are essential, as her attacks are fast and often cover wide areas.
Recommended Equipment
- Fire-resistant Armor: Since Red Napalm uses fire-based attacks, gear that resists fire is critical.
- Ranged Weapons: Guns, bows, or throwing weapons allow you to hit her while keeping your distance.
- Fast Melee Weapons: If you go in close, weapons with quick animations like machetes or katanas give you a better chance to dodge and retaliate.
- Healing Items: Stock up on healing mushrooms and recovery items. You’ll need them.
Red Napalm’s Attack Patterns
Flame AoE Attacks
One of Red Napalm’s most dangerous features is her massive area-of-effect (AoE) attacks that coat the battlefield in flames. These attacks are hard to dodge without timing and observation. She often uses them in combos, forcing players to stay constantly on the move. Standing still even for a moment can be fatal.
Melee Slashes
Despite her size, Red Napalm is quick with her bladed arms. She can perform rapid slash attacks that do massive damage if you’re caught in her combo. She often chains melee attacks after a flame attack, punishing players who rush in too soon.
Charge and Stomp
Another signature move is her forward charge followed by a ground stomp. The charge knocks you down, and the stomp creates an explosive shockwave. Keep your distance and avoid the charge line by dodging sideways.
Combat Strategy
Study Her Movements
Red Napalm’s attacks are telegraphed with animations. Pay attention to her shoulders and torso; when she leans back or raises her arms, she’s preparing to attack. Use these moments to dodge and prepare your counterattack.
Hit and Run Tactics
Trying to tank her damage is a bad idea. Instead, use hit-and-run tactics. Move in quickly, land a couple of hits, and retreat before she can respond. Ranged players can kite her around the arena, using structures for cover and firing when safe.
Use the Environment
The arena has structures and raised areas that can be used to your advantage. Use corners and walls to break her line of sight or interrupt her charge attacks. Some players even exploit vertical distance to avoid AoE damage, although this can be risky.
Rewards for Victory
Material Drops
Defeating Red Napalm can reward players with unique crafting materials required for high-level weapons and gear. These materials are exclusive to Hatred Bosses and can be used to create powerful items that give you an edge in both PvE and PvP.
Blueprints and Special Gear
Players sometimes obtain blueprints for weapons or armor modeled after Red Napalm’s design. These items offer high fire resistance and special effects, making them not just cosmetic but practical for late-game progression.
Bragging Rights
More than anything, defeating Red Napalm is a badge of honor. It proves mastery over one of the hardest bosses inLet It Die. Many players attempt this fight multiple times before achieving victory, and forums often feature victory screenshots as proud moments.
Tips from Experienced Players
Don’t Go Alone
If possible, bring in allies or Fighters from your waiting room to assist you. Multiple targets can help distract Red Napalm and give you better chances to land hits.
Patience is Key
This fight is a marathon, not a sprint. Don’t try to rush through it. Learn the patterns, take your time, and wait for the right moments to strike.
Practice with Other Bosses
Before fighting Red Napalm, test your skills against other Hatred bosses. White Steel and Black Thunder prepare you for the high-speed, high-pressure combat style required for this battle.
The Ultimate Trial in Let It Die
Red Napalm is a terrifying and iconic boss inLet It Die. With her overwhelming fire-based attacks, relentless aggression, and striking design, she embodies the brutal nature of the game’s endgame content. But with the right preparation, strategy, and persistence, she can be defeated. The journey to her lair, the intense battle, and the satisfaction of victory combine to make this encounter one of the most memorable experiences in the game. If you think you’re ready for the ultimate trial, then step into the fire and prove yourself against Red Napalm.