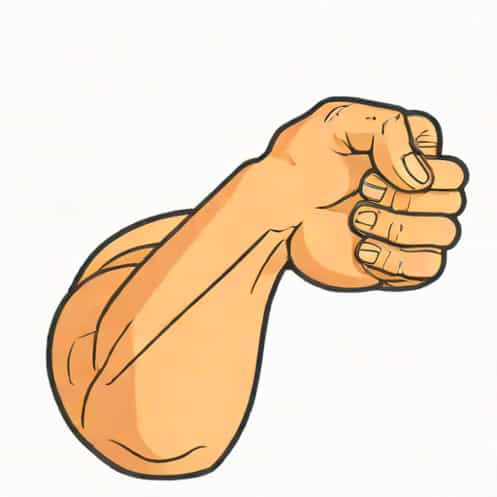
Drawing a flexing arm is a fun and rewarding artistic exercise, especially if you enjoy learning how to illustrate anatomy in a simple and approachable way. Many people find arms challenging because muscles can appear complex, especially when they contract during a flex. However, with a clear step-by-step approach and a bit of patience, you can create a realistic flexing arm sketch that captures strength, motion, and form. Whether you are practicing figure drawing or adding a character pose to your artwork, understanding the structure of a flexed arm will improve your overall drawing skills.
Understanding the Structure of a Flexing Arm
Before drawing, it helps to understand the basic anatomy. A flexing arm highlights the bicep, forearm muscles, and shoulder. You don’t need deep medical knowledge; a general idea of shapes and movement is enough for an accurate sketch.
Key Muscle Groups to Recognize
When the arm flexes, several muscles become more visible. Knowing where these muscles sit makes your drawing look more natural.
- BicepsThe muscle that bulges when the arm bends.
- TricepsLocated behind the arm and slightly visible depending on perspective.
- DeltoidsThe shoulder muscles that connect the arm to the torso.
- Forearm musclesA combination of small muscles that create subtle shapes.
Thinking of these muscles as simple shapes like ovals and cylinders helps you organize the arm structure effectively.
Gathering Reference and Preparing Your Workspace
Even skilled artists benefit from references. A real-life pose, a mirror, or an anatomical sketch can guide proportions, angles, and muscle placement. This preparation helps avoid unnatural shapes and ensures your drawing looks balanced.
Choosing the Pose Angle
A flexing arm can be drawn from the front, side, or a dynamic angle. Beginners often start with a side-view flex because it clearly shows the curve of the bicep.
- Side-view Shows the bicep peak clearly.
- Front-view Highlights symmetry and overall shape.
- Three-quarter view More advanced but visually striking.
Choose whichever angle feels most comfortable and gradually experiment with others.
Sketching the Basic Shapes
The best way to begin your drawing is by blocking out simple shapes before adding details. This method keeps your proportions consistent and prevents your arm from looking awkward or distorted.
Step 1 Outline the Shoulder
Start with an oval for the shoulder. This shape doesn’t need to be perfect; it only provides a landmark for where the arm begins. The shoulder helps set the angle of the entire pose.
Step 2 Draw the Upper Arm Cylinder
The upper arm can be drawn as a cylinder or elongated oval connecting to the shoulder. Keep the lines loose and light. This is where the bicep will be added later, so the structure should feel solid but not too rigid.
Step 3 Add the Forearm Shape
The forearm is slightly narrower than the upper arm and tapers toward the wrist. Use another cylinder-like shape and bend it upward to mimic the natural flexing position.
Step 4 Sketch the Hand
A flexing arm often has the hand in a fist. Draw a small block-like shape to mark the fist’s position. You will refine this later, but the placement matters for overall balance.
Defining the Muscles
With the basic structure in place, you can begin refining the drawing by outlining the main muscles. This step brings the arm to life and adds the iconic flexed appearance.
Step 5 Shape the Bicep Curve
The bicep is the star of the pose. Draw a rounded curve on the front of the upper arm, making sure it swells upward. The muscle should blend naturally into the shoulder and forearm.
Step 6 Add the Triceps Outline
Although the bicep dominates the pose, the triceps still contribute to the arm’s shape. Add a subtle curve behind the upper arm to suggest its form.
Step 7 Define the Deltoid
The deltoid connects the upper arm to the torso and adds strength to the pose. Draw a smooth curve connecting the shoulder shape to the upper arm cylinder.
Step 8 Add Forearm Muscle Shapes
Forearm muscles appear more segmented. Instead of one large curve, use several small shapes to indicate the different muscle groups. Don’t overcomplicate it; gentle curves often do the job well.
Refining the Wrist and Hand
A flexing arm looks incomplete without attention to the hand. Even though the fist is small compared to the arm, it adds important expression to the pose.
Step 9 Shape the Wrist
The wrist should look narrower than the arm but still connected smoothly. Avoid making it too thin, which can make the arm look unrealistic.
Step 10 Draw the Fist
A fist can be drawn by stacking small curved shapes that represent fingers folded inward. The thumb wraps over the front, and the knuckles form a visible ridge.
- Start with finger block shapes
- Add the thumb on the side
- Round out each curve to look natural
Adding Details and Enhancing Realism
Once the overall form is established, you can refine the drawing with muscle definition, shading, and contour details. These touches make your flexing arm more believable and visually appealing.
Step 11 Smooth and Correct Your Lines
Go over your sketch with cleaner lines. Adjust any parts that look out of proportion. Make sure curves flow naturally and avoid sharp corners unless the pose requires them.
Step 12 Add Muscle Definition
Lightly add lines that follow the natural direction of the muscles. Avoid over-detailing; subtle indications usually look better for a flexing arm drawing.
Step 13 Apply Basic Shading
Shading gives the drawing depth. Decide where your light source is coming from, then shade the opposite side of the muscles. Darken areas under the bicep and around the forearm curves for better dimension.
- Use soft shading for round muscles
- Keep highlights clean
- Blend shadows smoothly
Common Mistakes and How to Avoid Them
Even simple drawings of a flexing arm can run into common mistakes. Being aware of these issues helps you improve faster.
- Over-exaggerating musclesKeep shapes realistic unless drawing a stylized character.
- Ignoring proportionsForearms and upper arms must relate in size.
- Sharp muscle linesReal muscles flow smoothly, so avoid harsh angles.
- Hands drawn too smallThe fist should match the arm’s scale.
Practicing Different Styles
After mastering the basic technique, try experimenting with different artistic styles. A flexing arm can be drawn realistically, cartoonishly, or even as a stylized comic-book design.
- Realistic Detailed shading and accurate anatomy
- Cartoon Bold lines and exaggerated proportions
- Minimalist Simple curves with minimal detail
Practicing in various styles helps you understand the structure more deeply and adds versatility to your art.
Learning how to draw a flexing arm becomes much easier when you break it into simple steps. By starting with basic shapes, defining muscles, refining outlines, and adding shading, you can create a strong and dynamic arm pose that looks natural and expressive. With regular practice and attention to form, your drawings will continue to improve, and soon you’ll feel confident illustrating arms in motion or adding them to full-body sketches. Keep practicing, stay patient, and enjoy the process of building your drawing skills.